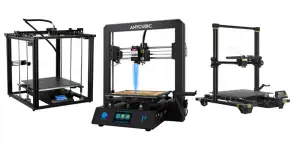
The JGMAKER Magic 3D printer is a competitively priced printer from JGAurora with a lot of features and a decent build area. It’s a great piece of machinery for 3D printing enthusiasts who enjoy putting together printers and modifying them as necessary. The JGMaker Magic proves to be a 3D printer that teaches its users along the way to high resolution builds.
Here are the technical specifications of the JGMaker Magic:
JGMAKER Magic Tech Specifications
- Build Volume: 220 mm x 220 mm x 250 mm ( 8.6 in x 8.6 in x 9.8 in )
- Build Speed: 10 – 150 mm per second
- Connectivity: SD Card, USB cable
- Software: JGCreat, Cura, Simplify3D
- Print Bed: Metal, Removable, Heated
- Leveling: Manual
- Filament: PLA, ABS, Wood, PETG, TPU
- Filament Diameter: 1.75 mm
- File Types: OBJ, STL, G-Code
- Nozzle: .40 mm single extruder
Design & Features
The JGMAKER Magic 3D printer is a sturdy machine with an aluminum base and gantry. It holds a larger open build area that prints jobs right off of the SD card. There is a USB SD Card adapter included with the printer that comes with JGCreat and Cura software along with PDF files and videos to help assemble the JGMaker Magic printer.
Once the 3D printer is assembled you’ll have to level the print bed manually. The print bed is heated, metal, and removable. Once the job is complete, the print bed can also bend slightly to release the build without having to gauge into the plate with a scraper. The print bed isn’t attached magnetically, but with binder clips to hold it in place. Be sure that the bed included with your JGMaker Magic DIY kit is the safer print bed with the heating components installed within the safe zone. Earlier versions had the heating elements running to the edge of the bed where the binder clips could short it out and wear it causing smoke or even a potential fire hazard.
When it comes to heat, test the thermistor as well to ensure the heating temperature is accurate between the JGMaker’s settings and the actual hot end. Temperature readings need to be accurate as it can affect the printing process causing builds to fail or warp.
A number of sensors featured on the JGMaker Magic assist the printing process. The Power-loss recovery allows the build to pause should the power cut out. This feature runs when the power is cut off purposely and accidentally. The filament detection sounds an alert when the filament runs low on a print. It’s best to clear out the extruder away from the build so it doesn’t glob the excess filament onto the layers once it resumes printing. It’s also necessary to note that the change filament option moves to the Tune option in the menu while it’s printing which is a different location from when the JGMaker Magic is idle. Should the SD card be removed during the printing process, the job is able to resume once it’s reinserted.
There’s easy access to the control board and built-in power supply as the bottom of the JGMAKER Magic is completely open which facilitates airflow and ventilation during the build. The internal stepper drivers aren’t replaceable and run motors loudly. The hot end compartment has large air holes for both fans to vent air efficiently.
Printing
Printing with the JGMAKER Magic 3D printer can be done fairly easily after some tinkering. The Z-motor is too flexible as-is and can cause the first layer of builds to squish or warp. This stepper motor is replaceable and should fix any warped layer issues. The printer is loud and should be used in a well-ventilated area.
The JGMaker Magic prints PLA extremely well. It prints ABS, but bote that the build area isn’t enclosed so it will be hard to maintain the consistent heat settings necessary for a successful ABS build. Some minor adjustments and much slower print speed is needed for other filaments like TPU and PETG.
The recommended build speed is 50 mm per second. Adjustments can be made to the nozzle to adjust for extrusion inaccuracies. While other file types can be supported with the various slicer software, they must be converted into G-Code for the JGMaker Magic to process the print job. The JGMaker Magic also performs better with proprietary filaments and doesn’t support the use of third-party build materials.
Packing
The JGMaker Magic comes ready to assemble right out of the box. There’s a note as soon as you open the package telling users to read the SD card prior to assembling. There are video tutorials available to walk users through the assembly and manual leveling process. There are also some PDF guides available to help troubleshoot any issues that may arise.
Here’s everything included with the JGMAKER Magic 3D printer:
- 1 x Aluminum Base with Print Bed
- 1 x Gantry Assembly
- 1 x Sample Roll of PLA Filament
- 1 x SD Card
- 1 x USB SD Card Adapter
- 1 x USB Cable
- 1 x Leveling Card
- 1 x Toothed Belt
- 1 x Nozzle
- 1 x Set of Screws
- 1 x Set of Wrenches
- 1 x Power Cord
- 1 x Spool Holder
- 1 x Clean Shovel / Scraper
Customer Support
JGMAKER Magic 3D printers come with a one-year warranty for the motherboard, print bed, and screen. The nozzle, thermistor, and a few other parts are covered under a three-month warranty. It’s fairly easy to reach out to customer service and request additional information on what’s covered by the company’s warranty. There are troubleshooting options available on the website via a Question and Answer forum based on common queries.
There are also office hours listed to contact sales and support. Be wary of modifying the printer and using third-party filaments as it can void the warranty. JGMaker Magic representatives can also be reached through email, Skype, WeChat, and WhatsApp.
JGMaker Magic Pros & Cons
Pros:
- The JGMaker Magic prints well with PLA, TPU, and PETG filaments.
- The printer is great for 3D printing enthusiasts who enjoy the DIY process as it comes ready to assemble in about 8 pieces and can be completed within a few hours.
- There’s a power-loss recovery option to resume printing should the power be cut to the JG Maker Magic printer.
- The slicer software is easy to use and to learn with.
- There’s a built-in power supply along with an easily accessible control board and hardware.
- There’s a filament runout sensor and SD card recovery feature too.
Cons:
- The print bed isn’t magnetic and fastens to the base with binder clips.
- It takes a lot of effort to print with ABS as the build area isn’t enclosed to maintain steady heat settings.
- The printer is noisy.
Verdict
The JGMAKER Magic 3D printer is for the 3D printing enthusiast who doesn’t mind assembling a DIY 3D printer kit. It will take some time to put together, but the SD card and videos should be reviewed prior to undertaking the task. Modifying the printer is possible but isn’t necessarily encouraged as some modifications can void the warranty.
Since the build area isn’t enclosed, and the process itself is louder than most 3d printers, the JG Maker Magic is better suited for labs and offices with adequate ventilation and conversation levels able to be carried over the noise.
The JG Maker 3D printer works with PLA easily accompanied by the filament runout sensors and power-loss recovery feature to ensure your build completes successfully. Tinkering and tweaking of the settings are required to get the JGMaker Magic running, but once it’s running, it prints really well and may be worth giving a try at its low price point.
Last update on 2025-06-06 / Affiliate links / Images from Amazon Product Advertising API


